Tag Archives: android 4.4 car stereo

image_pdfimage_print
06Jul/15

How to Install an LCD Monitor in Your Car

It's only fair to share...Share on FacebookShare on LinkedInPin on PinterestShare on RedditShare on TumblrShare on StumbleUponDigg thisShare on VK

Installing an LCD, or liquid crystal display monitor in your car can add a convenient method of visual entertainment, as well as practical functionality. The LCD monitor could be used for watching DVDs, playing video games, or for GPS navigation systems. It can be useful for long trips or just driving around town. To learn how to install an LCD monitor in your car, consider these suggestions.

Steps

0]3](A@_CR@8B2PO6M7JJJ9

1.Determine the location for the monitor. When installing an LCD monitor in your car, determining its intended purpose will help you know exactly where it should be installed. If the video playback will be primarily for children, for example, a popular option is to locate the monitor on the back of the front seat headrests for back seat viewing.

670px-Install-an-LCD-Monitor-in-Your-Car-Step-2
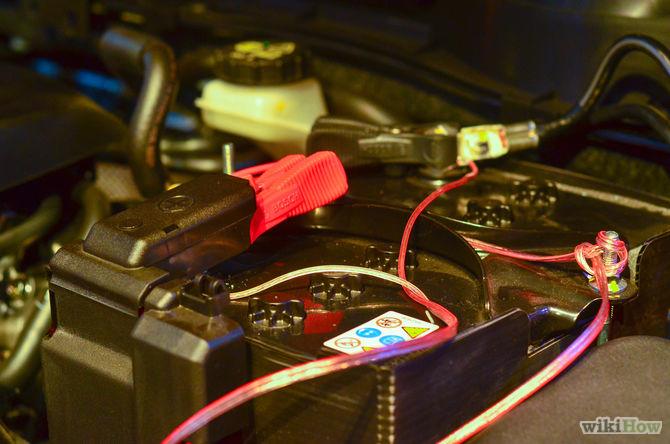
2.Disconnect the cables from the vehicle’s battery. Raise the hood and locate the vehicle’s battery. Verify the correct sized wrench or socket and remove the terminal attaching the battery cables to the battery. Disconnecting the battery will help ensure your safety, and protect the electronic components of your vehicle from short circuits.

670px-Install-an-LCD-Monitor-in-Your-Car-Step-3
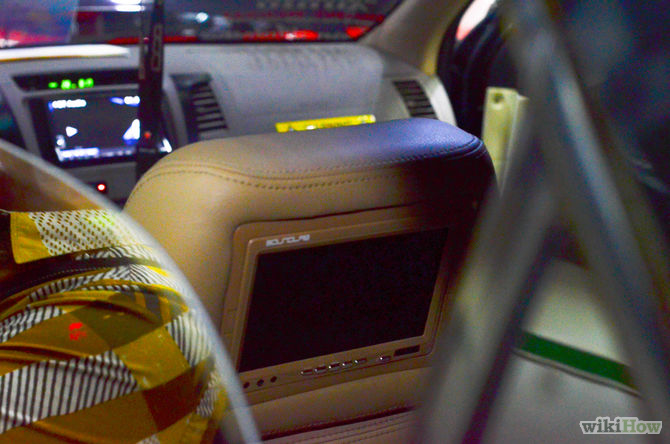
3.Purchase new headrests with built-in LCD monitors from an electronics dealer. This is the easiest method of installing an LCD monitor for back seat viewers.

  • Remove the old headrests by simply pulling them up from the seats.
  • Insert the new headrests in the same place. Attach the wiring to the DVD or video game player and nearest power source.

Mounting LCD Monitors in the Vehicle Dashboard

670px-Install-an-LCD-Monitor-in-Your-Car-Step-4

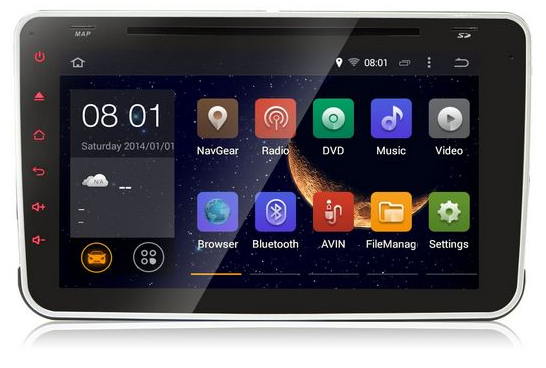
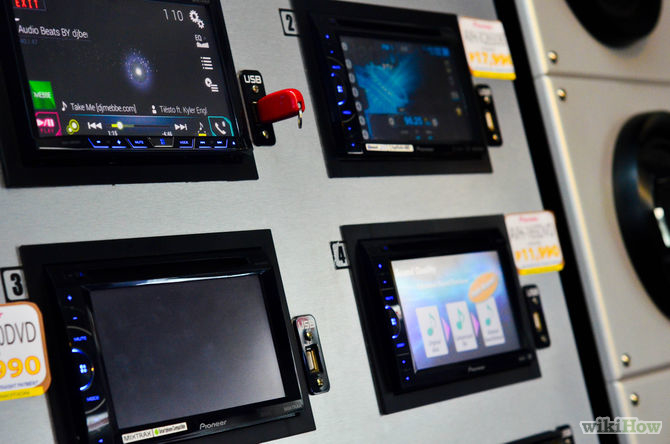
  1. Purchase an LCD monitor designed to retrofit the dashboard of your vehicle.This is the best option if the monitor is to be used by the driver and front seat passenger. Using standard tools, locate the screws or pins holding the face plate and any other cover from around the vehicle’s stereo receiver.
  • Unplug the existing wiring harness from the receiver and remove the old unit. Plug in the new LCD monitor unit into the wiring harness and insert it into the dashboard.
  • Reattach the face plate and other covers around the new unit. Take precaution not to strip mounting screws by over tightening.

670px-Install-an-LCD-Monitor-in-Your-Car-Step-5

2.  Reattach the battery cables. Place the terminals back on the battery and tighten with correct sized wrench. Now that the power had been restored, turn the new LCD monitor on and adjust the settings according to the manufacturer’s instructions. Test all the functions of your new unit, including the video and audio.

Source:  Wikihow.com

www.pdf24.org    Send article as PDF   
01Jul/15

Why would you need a new VW radio?

It's only fair to share...Share on FacebookShare on LinkedInPin on PinterestShare on RedditShare on TumblrShare on StumbleUponDigg thisShare on VK

A brand new VW radio will give you better sound and more playback options than the factory radio.

Better sound quality: Superior built-in power and better circuit design mean that an aftermarket car stereo isn’t just louder than the factory stereo, it also produces cleaner, richer, more detailed sound. Enhanced tone controls in the preamp section mean that you can do a better job fine-tuning the music.

New sources: One of most common reasons to get a new stereo for your VW is to expand your system’s music playback and other capabilities. Aftermarket stereos offer advanced capabilities, such as:

KGEWZR6~AW8@6F8XY[F$ISM

  • MP3/WMA/AAC playback
  • iPodand iPhone support
  • Support for Android phones
  • Satellite radio
  • HD Radio reception
  • DVD playback
  • Bluetooth connectivity
  • GPS navigation
  • Support for Pandora Internet radio and other app-related sources

We’re also seeing increased integration of smartphone apps with both iPhones and Android smartphones. Other popular reason for purchasing a new VW Android 4.4 stereo include:

More features: Advanced features on new stereos include full-color animated displays, customizable color schemes, touchscreen monitors, and precision sound controls like digital time correction and parametric equalization.

Cool cosmetics: Aftermarket car stereos, with their high-tech displays and cutting-edge layouts, can enhance the appearance of your car’s interior.

Expandability: Auxiliary inputs, USB connections, and audio/video outputs let you expand your system by connecting portable music players, rear seat video screens, external amplifiers, and powered subwoofers to your new stereo.

Security: Features like detachable face plates and security codes help protect your investment from theft.


www.pdf24.org    Send article as PDF   
25Jun/15

How to Improve the Sound Quality in Your Car

It's only fair to share...Share on FacebookShare on LinkedInPin on PinterestShare on RedditShare on TumblrShare on StumbleUponDigg thisShare on VK

When driving, a car can be a great place to enjoy music, but many people still put up with marginal sound quality that they’d never tolerate at home. Today, we will give you some suggestions on how to improve the sound in your vehicle. Follow these tips, you might don’t have to live with the bad sound any more.

Tips 1 : Add an amplifier.

Maybe you’ll say “My factory stereo puts out 200 watts, and that’s plenty of power.” But there’s huge difference between 50 watts peak power per channel produced by your Android car stereo and 50 watts RMS from an outboard amplifier. A separate amplifier will provide more clean power than any car stereo, and that’ll make a night-and-day difference in sound quality. Your system will sound better, whether you listen to Mahler at a conversational level or Megadeth turned up to 11. An amplifier is essential to getting great sound in your car.

7139aQFGYqL._SY355_

Tips 2 : Build a better sub box. Or buy one.

If you’re building a sealed subwoofer box, make sure it’s sealed properly. Air leaks can really hurt your sub’s performance. If you’re using a ported box, make sure you’ve got the right sub in there. You can destroy a sub that’s designed for sealed box use by driving it hard in a ported enclosure. Also, it’s important to build a box with the correct interior volume for the sub you’ve picked out. A mismatch can result in poor performance or a sub fatality. You can also avoid all of these issues by buying a premade enclosure that’ll work with your subwoofer.

Tips 3 : Select a lower level of compression for your music files.

Though you can store more music files in your music player if you use greater compression, and they’ll sound OK when you’re listening through earbuds. You’ll lose some high-and-low frequency information when you compress your music, along with some of the details that make your music interesting. And, on a good car audio system, you can really tell that something’s missing.

Don’t settle for the default setting when creating your files. If you want to use your iPod, smartphone, or MP3 player in your car, try using as little compression as possible. The higher the bit rate, the better your music will sound through your car’s system.

Source:  Crutchfield.com

www.pdf24.org    Send article as PDF   
image_pdfimage_print