If you have kids, take your car on long trips or enjoy camping, you may wish to install a DVD player in your car for entertainment on the road. You can purchase car multimedia player and LCD screen, or just a plain DVD player to use with existing LCD screens in your car.
Steps:

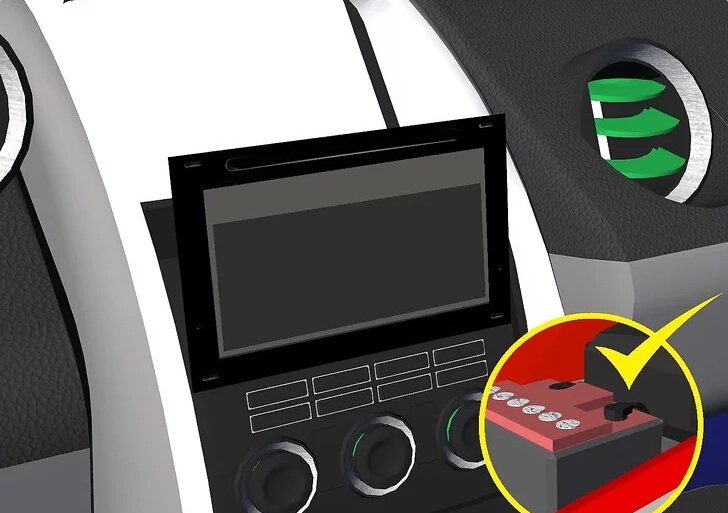
1: Open the hood of the car and disconnect the battery. You can disconnect the negative cable only and still be safe, but it’s best to disconnect both the positive and the negative cable.
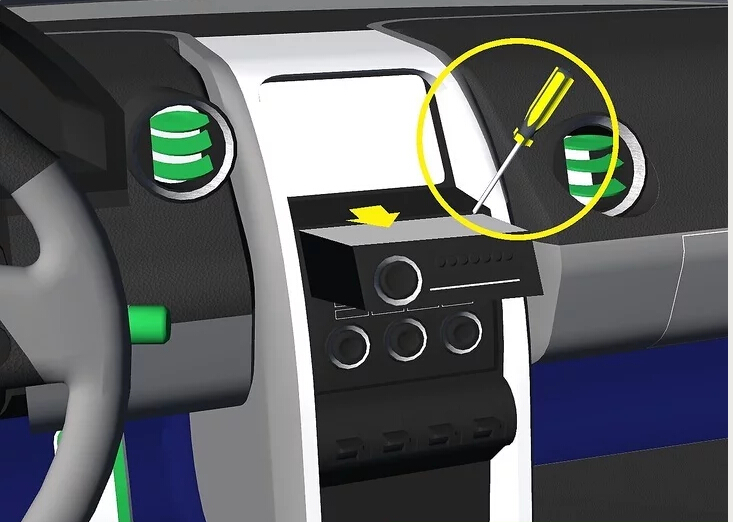
2:
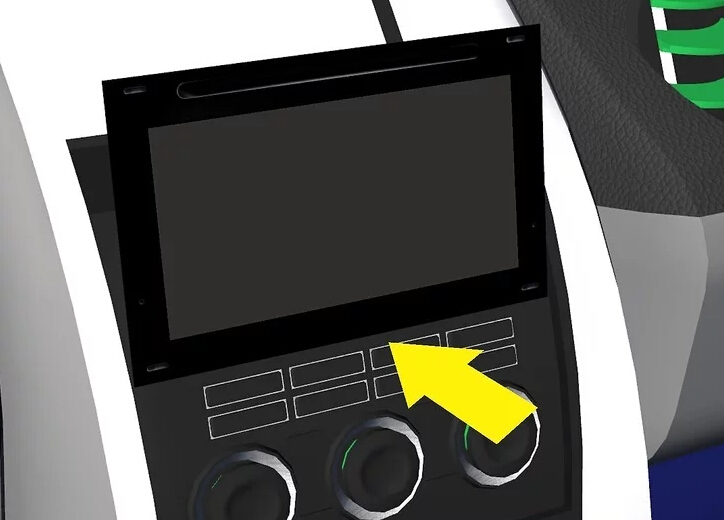
Using the proper screwdriver, take out the screws holding the factory stereo in your car’s dashboard, then remove the stereo from the dash. You may have to remove parts of the dash to take the stereo out.
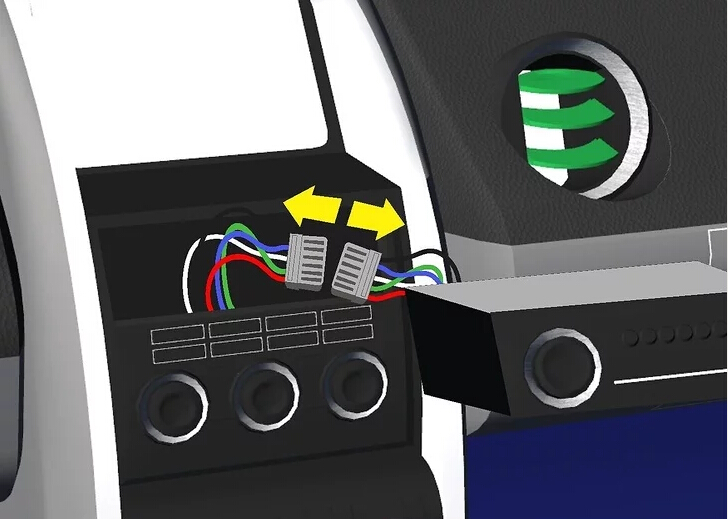
3: Carefully remove the connectors from the back of the stereo. Check the connectors to make sure they’re not broken or dirty.
4: You can buy a wiring harness designed for your vehicle at a car audio and video equipment dealer; these are intended for aftermarket installations. Connect the wiring harness to the car’s connector. See the wiring harness instructions for the proper connection.
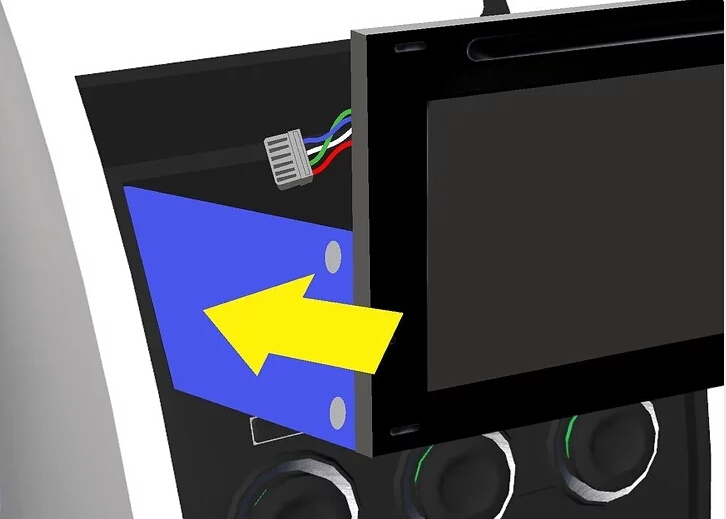
5: Insert the car DVD player in the aftermarket installation kit head unit. All dashboards are different, so you must buy an installation kit that matches the make of car.
6:Connect the other end of the wiring harness to the back of the car DVD player.Connect the antenna cable to the antenna input on the back of the car DVD player.
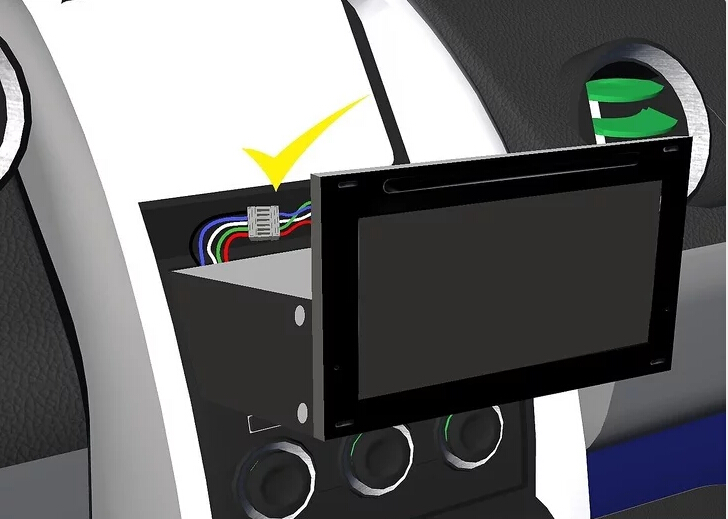
7:Insert the car DVD player and the installation kit in the car’s dash. Put in any screws that are required and replace any dash panels that you removed.
8:
Replace the battery cables and make sure they are tightened. Close the hood and turn on the car. The
car DVD player panel will light up if the installation was successful.
Related Posts
Basic Knowledge of Car DVD PlayerFeatures: As a replacement for CD player, car DVD playerhas been upgraded with more functions, such as GPS navigation and iPod/iPhone input etc. What’s more, it’s equipped with display screen and Win CE/ Android intelligent OS, which left a large space to expand and add more functions. Specification: The car audio playerwhich equipped with display screen is bigger than the traditional CD player. Currently, the double DIN car DVD player is quite common. Function:With the rapid development of electronic application technology in recent years, the car stereohas become a “integrated platform”. It not only supports Bluetooth, Wi-fi, but supports DVR and hands-free etc. Input:Generally speaking, CD/DVD, FM and DAB is the way to input audio and video. But nowadays, car audio player can read and play various audio, video and document files through USB/AUX/SD card and Bluetooth. Output:Choices for output include audio signal and RCA. To transfer the signal to DSP processor, few stereos would also support optical and coaxial output. Touch screen: More and more in-dash car DVD players are equipped with the HD touch screen. Therefore, the sensitivity and response speed of touch screen are important standards to measure the units’ Sound quality:Most Android car head unitis equipped with single DVD pick up head, which don’t perform as well as special CD pick up head. Thus, we’ll recommend users to buy DSP audio processor additionally.
FAQ for Pumpkin Car Stereo KD-C0223/KD-C0224 (2)Q7 : Why the OBDII scanner can’t be paired ? Or why can’t I read the information after pairing ? A : Firstly, please check if your OBDII scanner has a 4 digital Bluetooth pairing code. Secondly, go to the Bluetooth application of the radio, and set the pairing code of the radio to the same one as the OBDII scanner. Thirdly, open the Torque application, choose the OBDII scanner MAC address in the application setting. Below is a demo video to show you the operation: https://www.youtube.com/watch?v=PwFJx0V84VM Lastly, if the connection is working well, but not able to read your car MCU information, then it maybe the OBDII scanner is not compatible with your car, you may need to find another one. Q8 : Why can’t I search the radio stations ? A : First, please check if you have plugged the original car radio antenna connector to the radio antenna port from the radio tightly. Secondly, if connected well, please check if your car is in an area with good radio reception. Thirdly, please turn off the AF option on the radio menu to search the radio stations. Lastly, you could get a radio antenna booster to connect between the radio and the original car radio antenna plug. And please power the booster from the ANT-CON wire or the red ACC wire. Q9 : Why can’t I install the new car stereo ? ( the plug doesn’t fit or the size is different from the original one) A : Sorry about this! But we have already listed the measurement data of the radio in our description, so that clients can check before purchasing. And as you can see, the radio is a 2 din universal device with universal ISO cable harness. It will not fit all cars, some cars have an original cable harness instead of universal ISO connectors. For these cars, you may need modify the wiring or buy an ISO to special cable harness adapter to install the radio. Please tell us your car information, and take photos to show us your original car connectors. We will check if we have this wire adapter for you.
FAQ for Android Car Stereo Amplifier1.How can I populate my address book’s contacts into the Android car stereo universal? A: For downloading the address book’s contacts from your phone to the radio: firstly, you need to pair your phone with the Android head unit, then please click the contacts icon and search your contacts like the following picture: Please make sure that you use the built-in contacts in your phone, otherwise it can not be searched. Also, if your smartphone runs Android 5.0 OS or above, please allow all the submissions in your phone when the stereo searches the contacts. 2.After installing the car DVD player, I can’t hear any sound through the speakers or the Bluetooth. The music is attenuated but no phone or GPS instructions can be heard. Is there a hidden menu to give more volume to GPS and Bluetooth? A: Normally, we don’t have hidden menu to give more volume. And for setting the GPS app sound ( we pre-installed the IGO free copy version ), please check the setting below: You can re-install the IGO app from our SD card to check whether it would help or not. Besides, please enter the settings=>GPS, make sure that you turn on the GPS monitoring. You can turn up the GPS mixing ratio so that the GPS sound would be louder. As for the Bluetooth issue, if you make the phone call via Bluetooth, please well close your car windows and doors, then turn the volume of both your phone and the head unit to the middle level. You can also enter the factory setting ( the password is 126 ), and check the BT setting. 3.In case of the extra mic, how can I increase the volume ? I don’t find any possibility to adjust the mic volume in the car audio player. A: Please use the extra mic and increase the car radio’s volume. 4.I’m not able to get torque to recognize that Bluetooth is on. Therefore, I can’t connect Bluetooth to the OBD. I can connect to it from my phone but not from the Pumpkin Car Head Unit. Is there something I can do to get this to work ? A: For pairing the OBDII, you need to know the protocol of your car and select the correct protocol in “Torque”. Followings are the whole instruction: ①Please enter “Bluetooth ”application, then set the pairing code of the radio to the same one as the OBDII scanner’Generally, it would be 0000 or 1234. ( please try both ) ②Then please open the built-in torque, choose the OBDII scanner MAC address in the application setting and choose your car protocol. 5.How do I change the default music app ? A: Since the car DVD player Bluetooth is based on Android 4.4, you can download other music player apps like Spotify in the built-in play store ( need Wifi or other Internet source ) and install it on the head unit.…