Installing a rear -view camera in your car can help prevent mishaps when you’re backing up your vehicle. This device is especially helpful if you’re backing up larger vehicles such as trucks and RVs, because it allows you to view people and items behind your vehicle that cannot be easily seen. Learn how to install a rear-view camera in your car to help you see behind you and prevent potentially damaging accidents.
Steps:

1. Research and purchase the type of rear-view camera installation system that is best for your car. If you are unsure of what type would be best, you can ask for advice at a local auto repair shop.
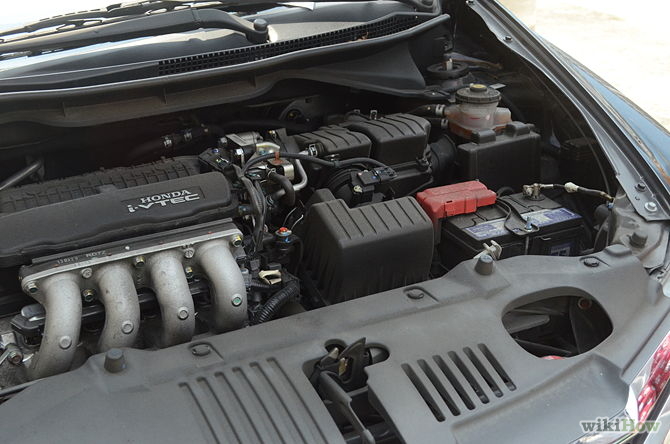
 2. Disconnect the vehicle’s battery by pulling off the negative cable.Wire the camera to the battery according to the instructions provided with your kit. The battery acts as the camera’s power source

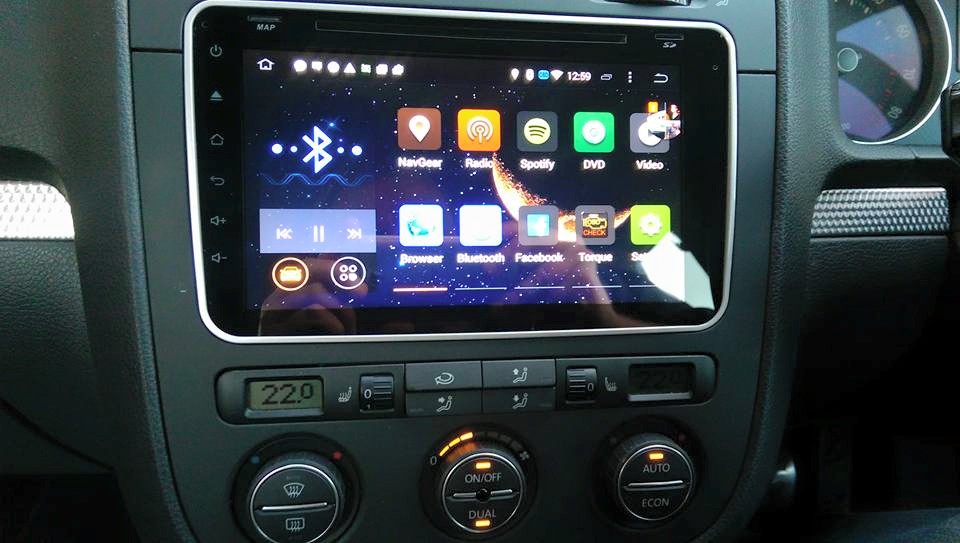
3. Install your rear-view camera monitor. There are several possible locations to install the monitor. The most common locations are on the dashboard or sun visor. The monitor will allow you to view anything behind your car before you back out, so it should be placed in a location that is convenient when driving.

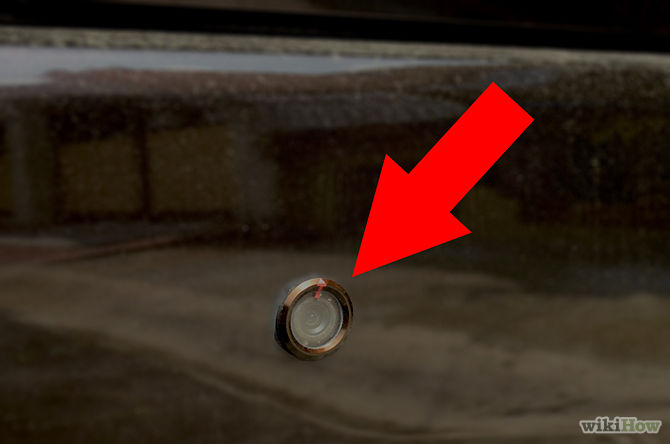
4. Use a drill to install the camera.Mount the camera on the bumper, license plate, or other location at the rear of the vehicle. The kit will include all the necessary mounting hardware. Attach the camera’s power wire to the back-up light power wire on your car. If you purchased a wireless camera, you do not need to wire the camera. Reconnect the car battery.
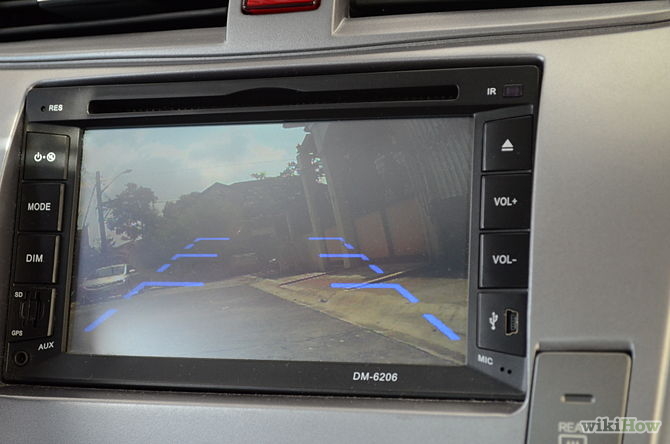
 5. Test the camera before attempting to drive with it.Make sure you can clearly see what is behind the car. Turn on the camera and monitor, place an immovable object behind the car, put the car in reverse but keep your foot on the brake, and verify that you can see the object in the monitor.
Tips:
- Many rear-view cameras are designed to only work when you have the car in reverse. The manufacturer may provide instructions on how to rewire it to work anytime the car is turned on.
- Before you permanently mount the monitor, try different locations to make sure it stays put and that you are happy with where it is located. Most kits come with double-sided tape, screws, and other mounting hardware.
- You can mount the camera on the car’s plastic bumper if you want to avoid drilling into your car’s sheet metal.
Source: wikihow.com
For more Android car stereos, please visit autopumpkin.com
Related Posts
Car Stereo Installation GuideBy Robert Ferency-Viars This installation guide walks you through the process of installing a new Android car stereo. Please read over these guidelines before beginning the installation in order to give yourself an idea of what to expect. Tools Needed (depending upon vehicle) Remove the factory stereo When installing a new stereo in your car, your first step will be to remove the old stereo. Pay close attention to the steps involved, for the process for installing your new stereo will be the same, but in reverse. For detailed information on how to remove the factory stereo in a specific vehicle, refer to your Crutchfield MasterSheet™ instructions, if available. They will walk you through the process step-by-step. Otherwise, you may use the general guidelines below. Before you begin, start by setting the parking brake and removing the negative cable from the car battery to prevent accidentally short circuiting something. Disconnect your battery's negative terminal before any installation job to protect your electrical system.. Your factory stereo will be mounted in one of two ways: secured in a metal mounting sleeve by spring clips bolted to the dash with brackets…
Differences between Single DIN and Double DIN Android Car StereoIf you want to buy an aftermarket Android 4.4 car stereo, you should base on your car’s year, make and model. Normally, aftermarket head units are rectangular and the standard car stereo size is referred to as single DIN. Most cars have single DIN stereo slots. The measurement of a standard single DIN slot is 50mm height by 178mm width. Most car radios will slide directly into the single DIN slot without requiring an additional adapter kit. However, some DIN models may require an installation kit. The second most common car stereo slot size is the double DIN. Double DIN slots are twice as tall as the standard single DIN slots, but they have the same width as single DIN stereos. We carry double DIN car stereos that slide directly into the double DIN slot. If you have the space, double DIN models are great because they usually feature LCD monitors for video playback and GPS navigation. Actually, the double DIN Android head units have become more popular: many vehicle manufacturers (especially of Asian cars) created a DIN CD player for use with a DIN cassette/radio unit. The main advantage to an aftermarket double DIN is that it’ll look better in the dash of a vehicle that uses a stock double DIN head unit. A larger head unit can have larger controls and a larger display, which making it easier to use. The best in-dash mobile video and navigation units are double DIN, because they don’t require a flip-out mechanism for the viewscreen. Regardless of classification (single DIN, double DIN, etc.), the stereo’s depth is unique for each model. The installation may require some customization if your vehicle has a relatively shallow cavity. Though you may wish to perform custom installs, it’s always wisest to choose a model that will fit your car perfectly. Check out our website to find out what will exactly fit your vehicle. This will save you a lot of time, money and hassle when it comes time to install your car stereo.
How to Install an Android Car StereoFirst, turn off the electricity to the machine by removing the live battery wire from its station. After disconnecting the battery, you’ll need to take off the trim boards enveloping your car stereo. Each car just a tiny bit unique here. Next, you need to dispatch the previous head unit directly out until the wires connected to the back are accessible. Unplug the cord, discharge the cabling harness and proceed to remove the antenna cable by unscrewing it. The cabling harness is the structural fastener that integrates all of the cabling for the sound system into an individual connection. The new head unit you have purchased should have included an adapter that matched the factory installed cabling. The end of the cabling on the end, should have four to eight colored wires coming from the back. There should be two such wires that plug to each speaker; one positive one negative. Most negatives are shown with a black stripe while positives are generally either solids or have a white stripe. If your new car DVD player does not come with an adapter that works with the harness in the dash, you need to purchase a cabling harness kit. The new harness will have to be plugged into the new stereo. Match the colored wire to its match and put them together. After having the wires connected to their proper match, the stereo should be ready to install. Hold the system to the dash to plug the proper connections into the back. You can pause and test what you have done to make sure you have correctly pared the wires. Once you find that everything is in order; proceed to carefully push the unit all the way into the dash and replace the screws. After the stereo is mounted correctly, put the trim boards back up and reattach everything holding them in place. Finally, you got a new Android stereo for your car.
 2. Disconnect the vehicle’s battery by pulling off the negative cable.Wire the camera to the battery according to the instructions provided with your kit. The battery acts as the camera’s power source
 5. Test the camera before attempting to drive with it.Make sure you can clearly see what is behind the car. Turn on the camera and monitor, place an immovable object behind the car, put the car in reverse but keep your foot on the brake, and verify that you can see the object in the monitor.


