image_pdfimage_print

All posts by Auto Pumpkin

24Apr/17

How to Make Your Car Spotless Like a Professional

It's only fair to share...Share on FacebookShare on LinkedInPin on PinterestShare on RedditShare on TumblrShare on StumbleUponDigg thisShare on VK
Making your car spotless and clean is not so easy. You must be do it in professional way then you can do it otherwise it will not possible. Well, everyone must know about some techniques to clean their car and make their car spotless.Are you looking for refurbishing your car by yourself? Then it is a good option you can do by learning just a few tactics which are just precautions for you to follow. If you want to keep your car’s good spark, then you need to take care of it. If we talk about professional, then we can say they have improved terminologies at the advanced level they know what the ways are which need to adopt for its long lasting look. So keeping its original look, we are here with some valuable tips which will let you know how to valet your car like an experienced pro? Frequent ways are in the queue to make your car condition attractive for you. If you don’t want to hire professionals for Car Valeting in Leeds or nearby areas, then go ahead with the following methods by yourself.

1. Vacuum cleaner:
This will help you out to remove debris from inner parts of the accelerator or anywhere. Enough length of hosepipe will give you access to hard to reach places.  Hold hosepipe carefully in your hand with the cup grip and do vacuum cleaning.

 car vacuum cleaner

2. Cleaning plastic surface:
You can easily wipe out with Luke warm water with any detergent. Make sure the cloth which is being used to sponge should be damp. For long lasting look and protection buy any soap which is primarily manufactured for this purpose. You can have professional advice on this too.

3. Wheels Cleaning:
You need to use best quality cleaning detergent for wheels. If you get a protective sealant for your wheels, then it will coat your wheels which will be a repellent for iron material particles in brake dust.

4. Windows vacuuming:
If you do waxing and washing for your window, then you can easily get rid of stains. But avoid doing waxing on window surface because it will do blur.

5. Washing:
Pressure wash your car with the distance of 4 inches it shouldn’t be close to the surface. First remove dirt from the surface then wipe out with a special cleaner and then throw water in high pressure.

6. Drying:
After pressure wash use two large clothes for drying. One of drying purpose and another one of finishing touch.

7.Polishing:
Apply some high-quality care for car stereo polishing which will keep your original vehicle look for long terms. Various excellent products are in the market to polish your car.

These are some methods which you can apply for valeting. Different hiring companies are offering valeting services for your vehicle. They will do quickly as well as with professional tools. They know how to do effectively. Car DVD players and across the areas are offering various deals for your car using effects and detailing in cost effective prices. You can have them for the betterment of your vehicle. There is not any hindrance by doing yourself but for example if you applied some low-quality car accessaries then you will feel pity for yourself. So before starting to go with complete information first then use any tricks.

Buy cool and good quality android car stereoandroid car radiopumpkin vw radio follow the link below

Official Site for Autopumpkin: http://www.autopumpkin.com

UK site: http://www.autopumpkin.co.uk

GE site: http://www.autopumpkin.de/

www.pdf24.org    Send article as PDF   
20Apr/17

How to Install an After Market Radio in a VW Jetta 2003

It's only fair to share...Share on FacebookShare on LinkedInPin on PinterestShare on RedditShare on TumblrShare on StumbleUponDigg thisShare on VK

The 2003 Volkswagen Jetta Car Stereo features an eight-speaker audio system with an in-dash “double-DIN” combination CD player and tape player. Thanks to the double-DIN size mounting provisions for the radio, installers have a broader range of choice when selecting a suitable aftermarket unit. Although the removal and installation process for the audio head unit can be achieved in a relatively short amount of time, several accessories are required to adapt an aftermarket unit to the vehicle.

Continue reading

18Apr/17

Tips On Installing Android BMW Navigation System DVD Player

It's only fair to share...Share on FacebookShare on LinkedInPin on PinterestShare on RedditShare on TumblrShare on StumbleUponDigg thisShare on VK

More and more BMW X5 E53 owners prefer to upgrading the factory car stereo with an aftermarket one which has DVD player and GPS navigation system built-in,such as Pumpkin Android BMW navigation dvd,wince 6.0 BMW navigation car dvd. And some of these people would like to install the new replacement by themselves, but there may be some problems during installation if you have never installed an aftermarket car gps dvd palyer before. We write this post to introduce you some tips on installation of Pumpkin android 5.1 BMW Car Navigation GPS DVD Player.

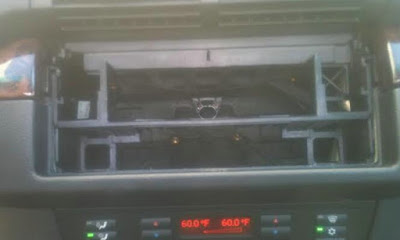
If your BMW X5 e53 just comes with factory car radio and CD player in dash, there’s a plastic cage inside of the dashboard as you can see after you take out the factory radio and CD, if you don’t remove this cage, you may think it does not fit into the opening of the original entry, the new BMW navigation dvd unit can not be pushed entirely into the dashboard, see pics below:


Don’t worry, there are two methods which can allow you to push the new BMW X5 navigation car dvd into the dashboard fully. Some installers just cut the plastic cage, and others remove it.

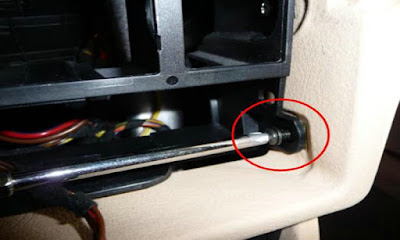
In order to remove the plastic cage, firstly take off the 4 screws that hold the cage in place, 2 on the right side, and 2 on the left side (same as right side). The following pictures are for your reference:


You need to pull down and slightly left the dash part which is close to the steering wheel. When you are doing this, use your other hand to push down in the middle of the opening where the cage is, and as you opened/pulled the dash/trim this far, you are able to hold it with one hand in this position and start wiggling the cage with your other hand. When are doing this, some force is necessary, but not too much. Once you start playing with it, you will get the jest on how to pull out the hooks, then as you have the left hook out, you now pull to a side and down on the right side (glove compartment side) to clear the other hook.

Once you removed the plastic cage, you are able to push into the new unit into the dash fully. And you will need to use the included iron frame support to fix the new unit to the dash, you may check the following photo as referrence.

If your BMW X5 E53 comes with factory navigation system, there’s a large screen in the dash, the 17pins(before year 2002) or 40pins(after year 2002) plug is not at the back of your factory radio, it’s located under the trunk, so you need to use a 5m long power cable with 17pins or 40pins plug to connect the correct plug under the trunk.

The following video may help you about that!


Pumpkin official websites:
German site: www.autopumpkin.de
www.pdf24.org    Send article as PDF   
image_pdfimage_print