[Customer Review for Pumpkin] Golf Android car stereo with rear camera
I am quite often adding a trailer to my MK5 VW Golf. I have installed the Pumpkin radio in my car and also a rearview camera that works successfully. I have also added a front camera on the front grille VW emblem which works with the AVIN app (no recording of course).
So I want to mount another RVC on the back of my trailer so that it makes it easier for me to park it when backing into somehow narrow spaces.
Therefore, I am thinking is there a way to alternate the RVC viewing from car bumper to trailer, when the trailer is hitched? Or maybe I should install some kind of switch to alternate the views? Is it possible to have a split-screen with both cameras?
Well… I did it! I mounted a second camera on the back of the trailer!

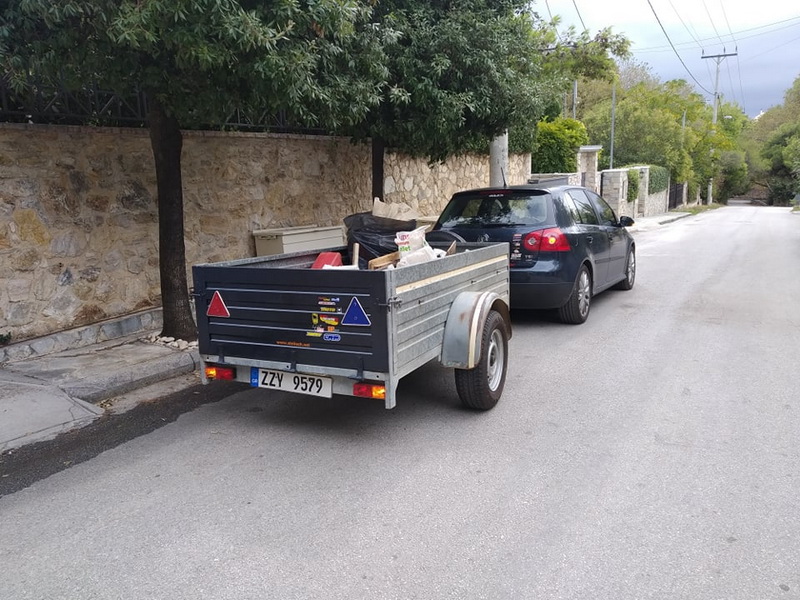
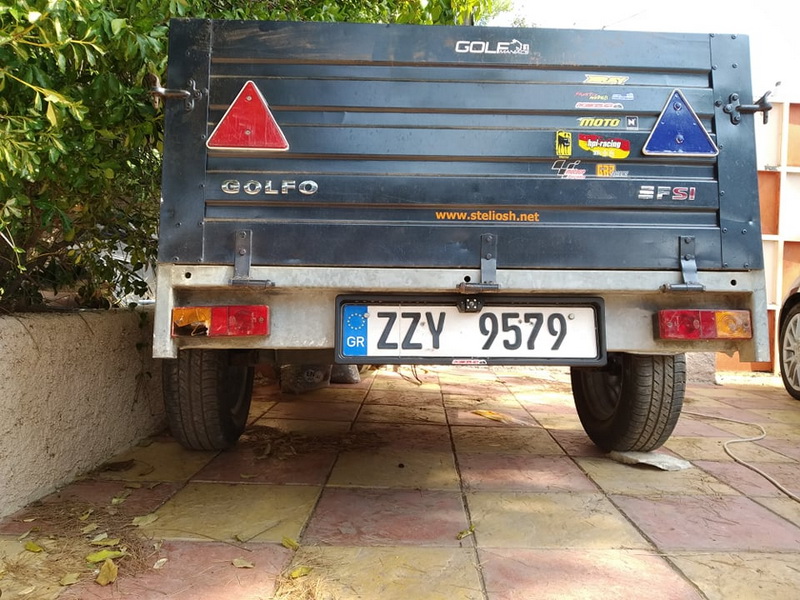
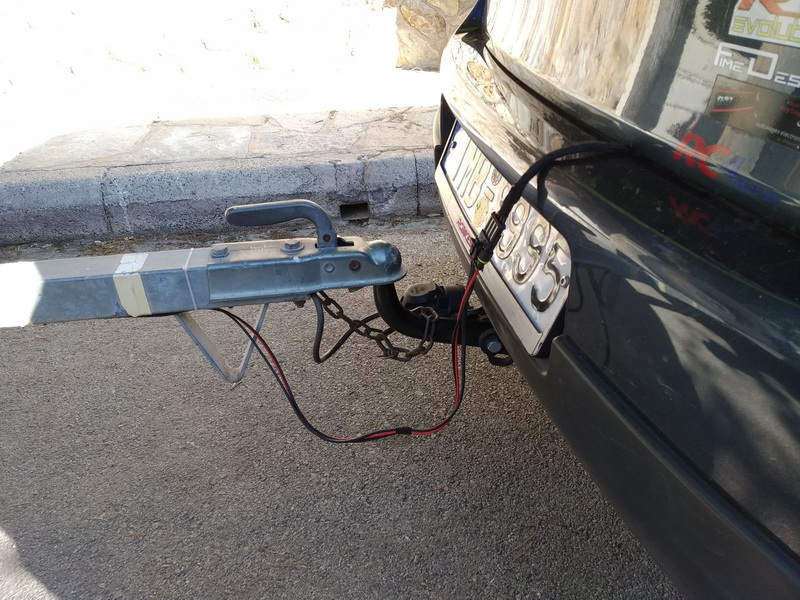
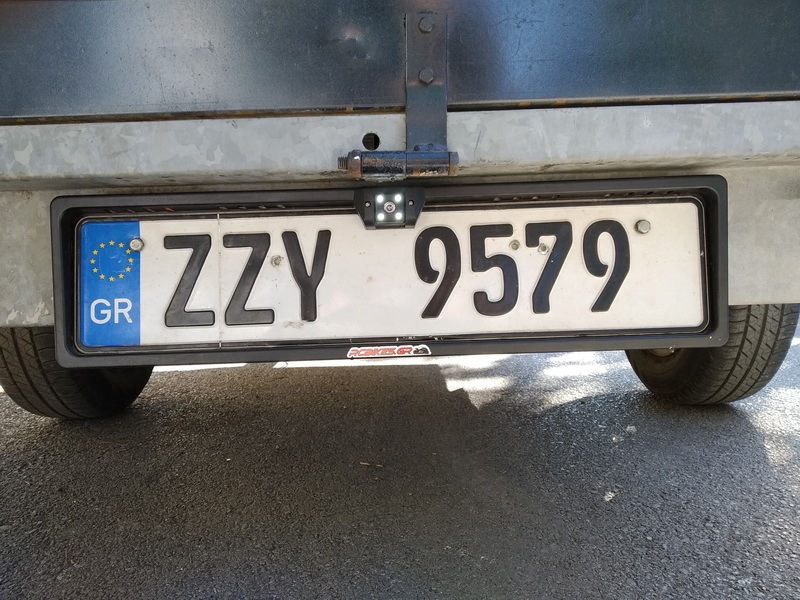
The trailer complete with the camera. It is located on the license plate border.
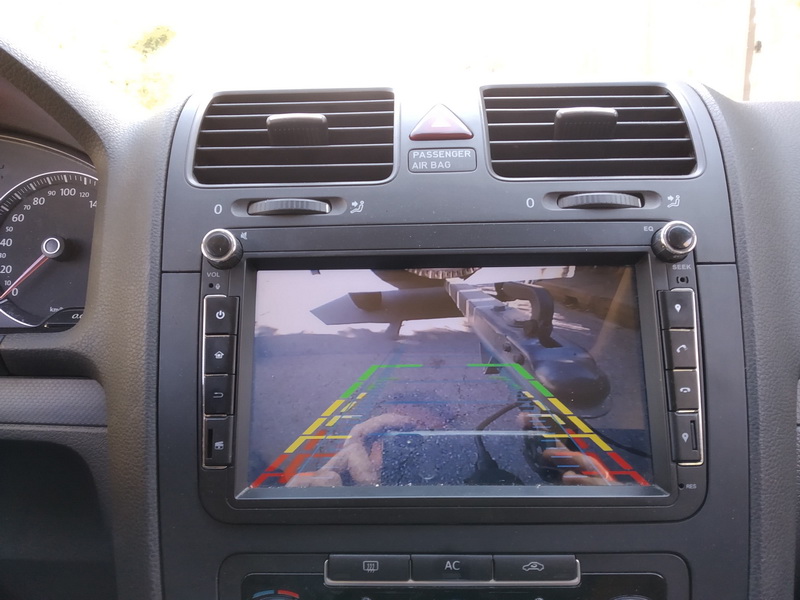
What the car camera shows when the trailer is attached.
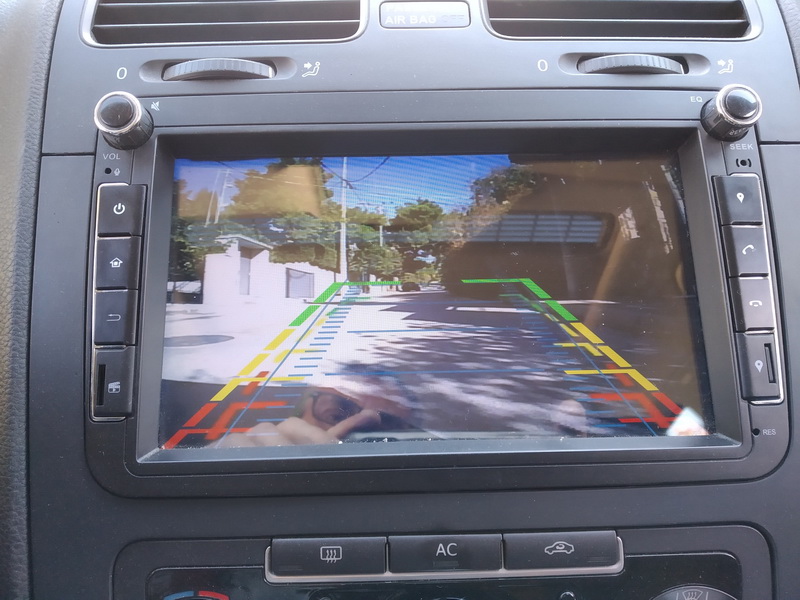
What the trailer camera shows!
The specific implementation steps are written in Greek.
Πρακτικά, έχω ένα θεματάκι, όταν κάνω όπισθεν στο δρόμο, με το αυτοκίνητο κάθετα στη γκαραζόπορτα, να “σημαδέψω” με σχετική ακρίβεια την πόρτα. Τις περισσότερες φορές, μια και το τρέιλερ “διπλώνει” πολύ εύκολα, για να ξεκινήσει την είσοδο (με την όπισθεν πάντα) στο γκαράζ, τυχαίνει να μην ξέρω με σχετική ακρίβεια αν όντως έχω “σημαδέψει” σωστά την είσοδο… Μερικές φορές, βγαίνω, κοιτάω που πάει, και συνεχίζω.
Με την κάμερα, αυτό το… γλιτώνω!
Απ’ την άλλη έπρεπε να κάνω τις συνδέσεις τρέιλερ και αυτοκινήτου αδιάβροχες. Αυτό ήταν το πρόβλημα 2. Το πρόβλημα 3 ήταν η σωστή σύνδεση των ηλεκτρικών της κάμερας του τρέιλερ με την κάμερα του αυτοκινήτου και το 4ο πρόβλημα να βρούμε ένα διακόπτη που να εναλλάσσει τις κάμερες στο ραδιόφωνο!
Μια χαρά!
Κάμερα κατ’ αρχήν! Αγοράστηκε απο μαγαζί στην Λεωφόρο Αθηνών 46, προς 11 ευρώ!
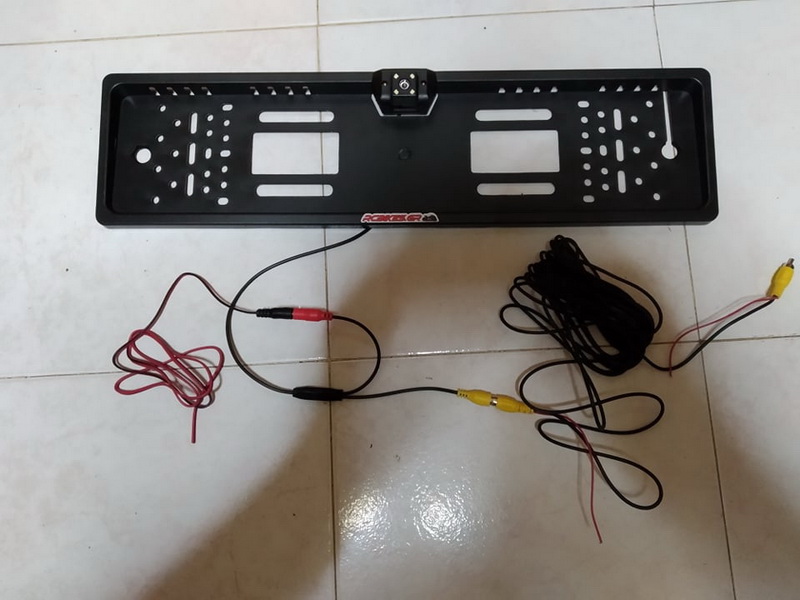
Κομπλέ με καλωδιώσεις, καθώς και ρύθμιση ύψους.
Οι καλωδιώσεις κόπηκαν πάραυτα!
Επεσε… μοντελισμός!
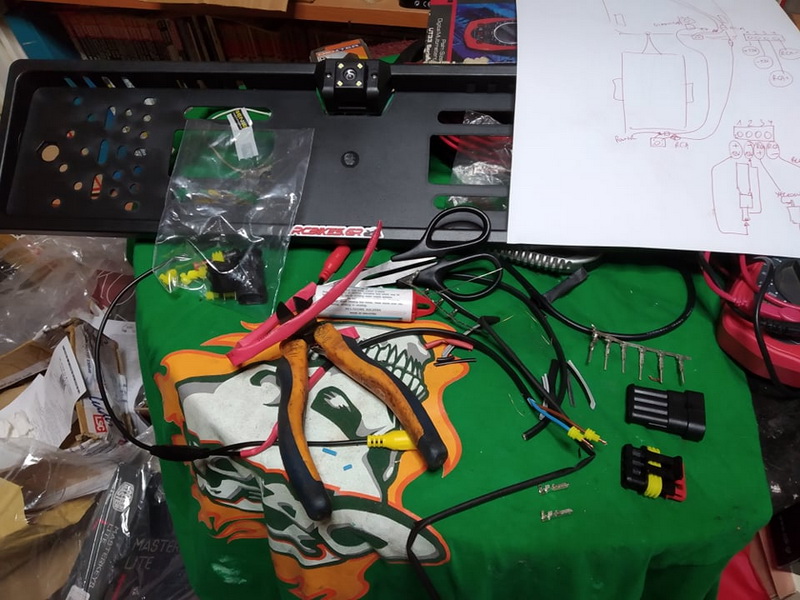
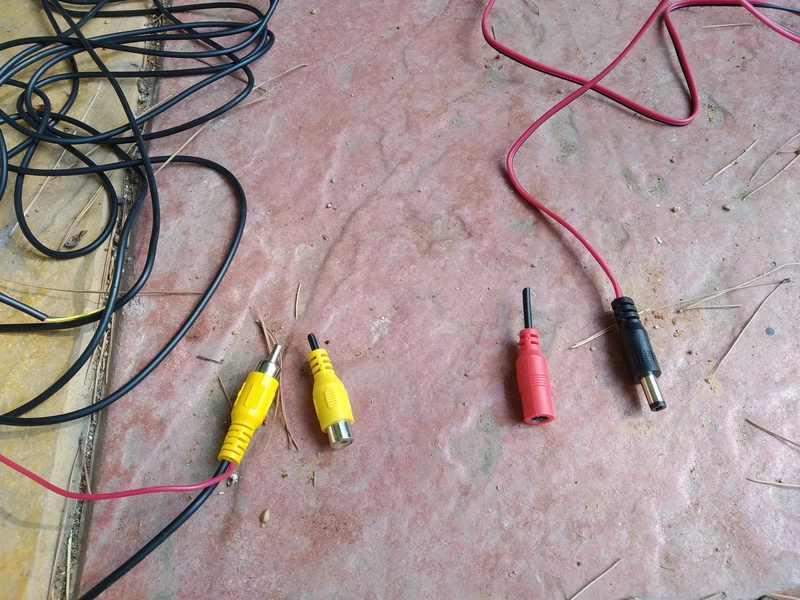
Ξέρουμε ότι η κάμερα έχει 4 καλώδια. Δύο για ρεύμα και δύο για video. Εκανα ένα σχέδιο για να θυμάμαι που βαδίζω. Ευτυχώς οι φίσες έχουν αρίθμηση στα πιν!
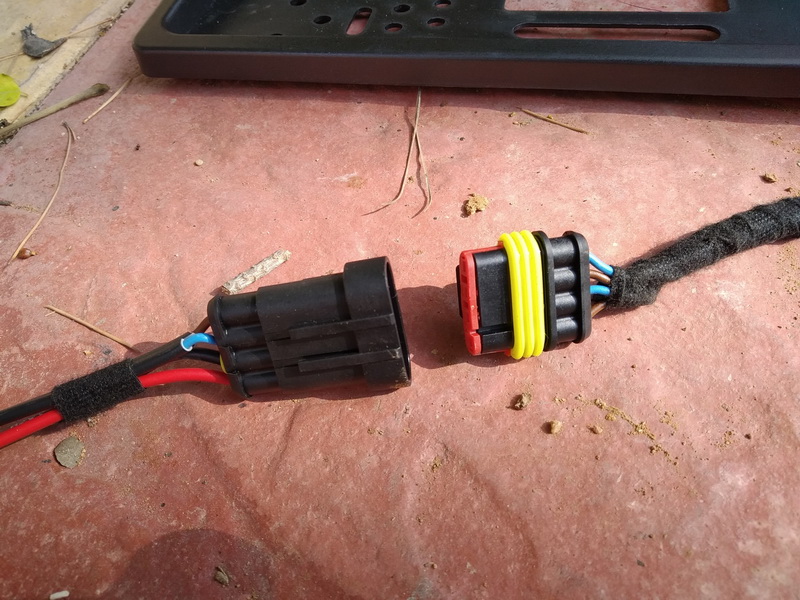
Πήρα από το Βενιέρη 2 τέτοια σετ, φούλ αδιάβροχες φίσες τετράπινες!
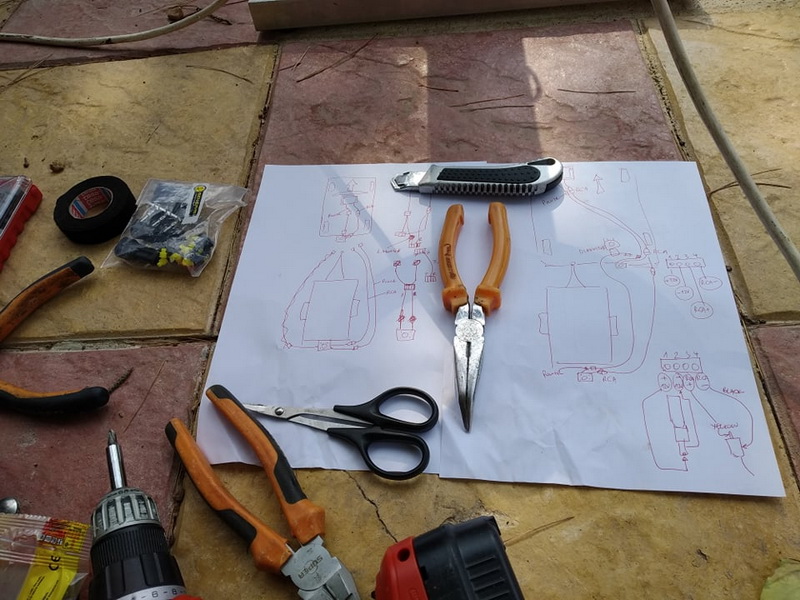
Βρήκα και οδηγίες (στο site του Βενιέρη!)
Πήρα και μια ειδική πένσα ηλεκτρολόγου, και ένα σετάκι βύσματα… Ποτέ δεν ξέρεις! (Χρειάστηκα μερικά!). Α… πήρα και ένα διακόπτη ΟΝ-ΟΝ δύο θέσεων. Θα τα πούμε πιο κάτω για δαύτον!
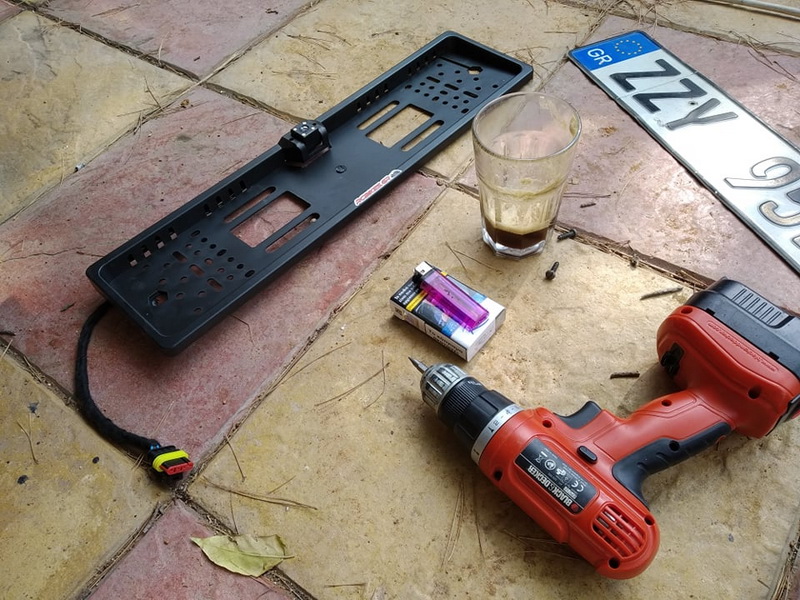
Ετοίμασα μια καλωδίωση για το τρέιλερ…
Μπήκε η βάση πινακίδας με την κάμερα πάνω στο τρέιλερ…
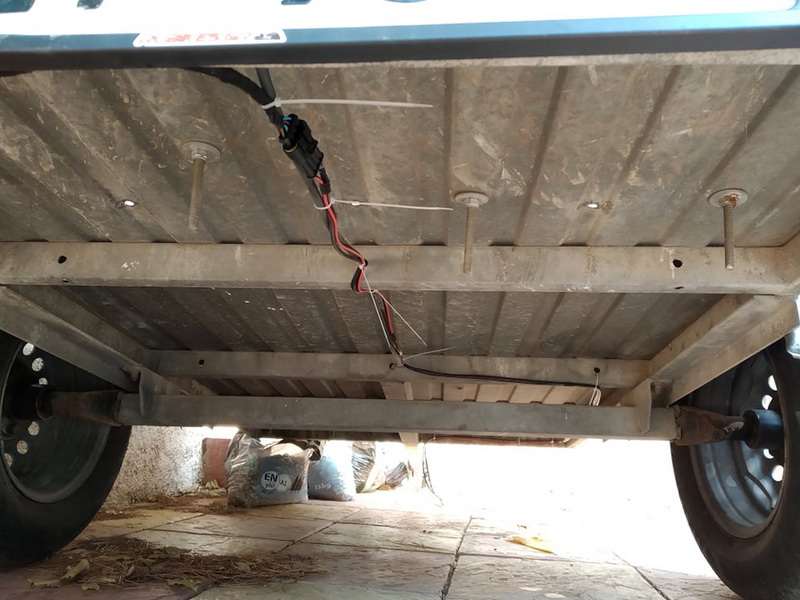
Πέρασαν τα καλώδια απο κάτω… (ναι, ξέχασα να κόψω τα ζιπάκια!)

Η κάμερα έτοιμη!
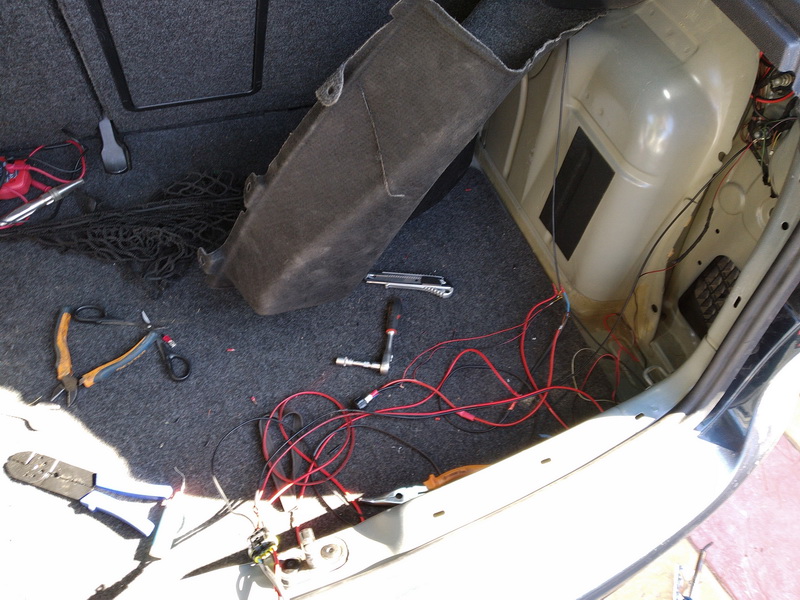
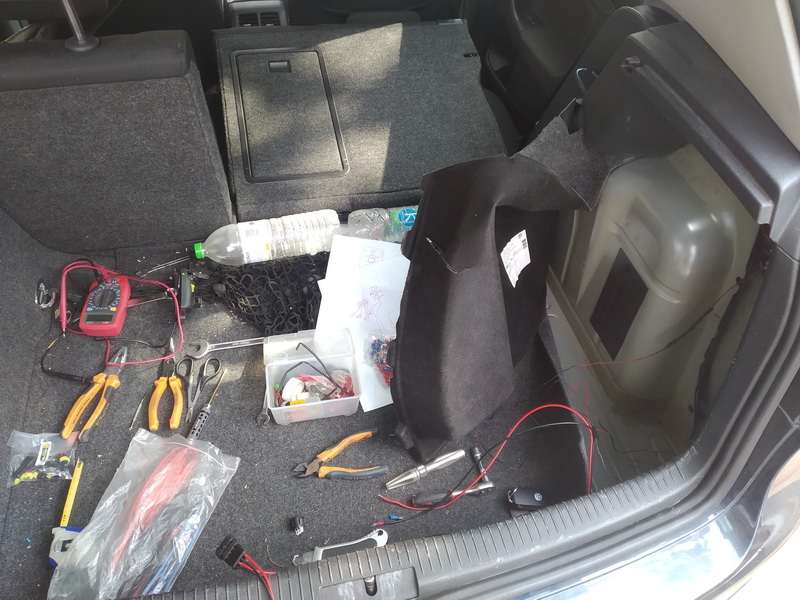
Πάμε στο αμάξι! Βρίσκω τις καλωδιώσεις της κάμερας του αυτοκινήτου.
Ενα περίεργο πράμα εδώ. Βρίσκω το αρνητικό ρεύμα της κάμερας. Αρχικά είχα σκεφτεί να βάλω στο διακόπτη το (-) του ρεύματος της κάμερας…
Πάει σε μια γείωση στο σασί, στο εσωτερικό του πίσω δεξιού φτερού. Την κόβω για να ματίσω και να στείλω στο διακόπτη. Δοκιμή… και η κάμερα ΠΑΙΖΕΙ με κομμένο το καλώδιο (-) του ρεύματος! Τι στο καλό;
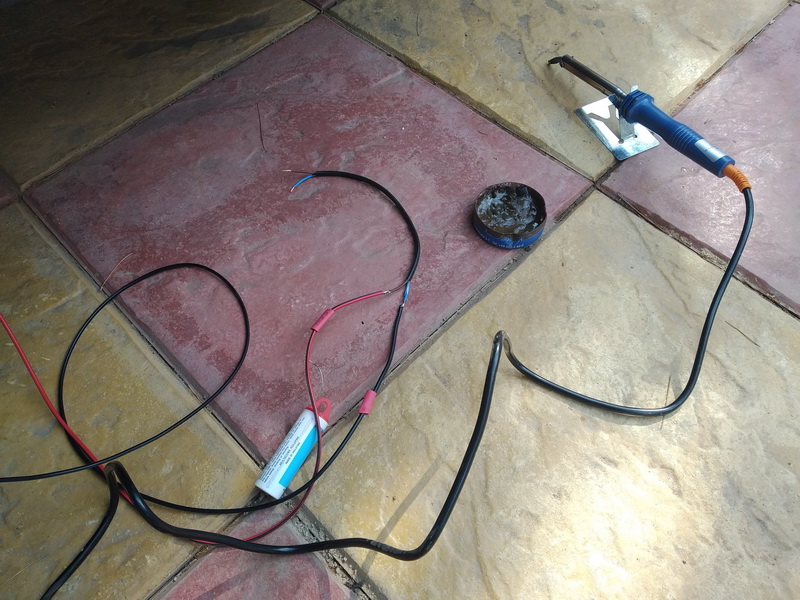
Πολύμετρο και αρχίζω να ψάχνω να δω που έχουμε “βραχυκύκλωμα”! Λοιπόν… και οι 2 κάμερες, παρότι έχουν καλώδια ρεύματος (-) μαύρο και (+) κόκκινο, το (-) το ενώνουν με το (-) του Video (στο RCA)!!!
Οπότε, παρότι έχω φέρει μπορστά στο τρέιλερ 4 καλώδια, στην ουσία χρειάζομαι 3! (Παρόλα αυτά, το (-) του ρεύματος της κάμερας το έβαλα στη γειωση του αυτοκινήτου!).
Για να το ανακαλύψω…
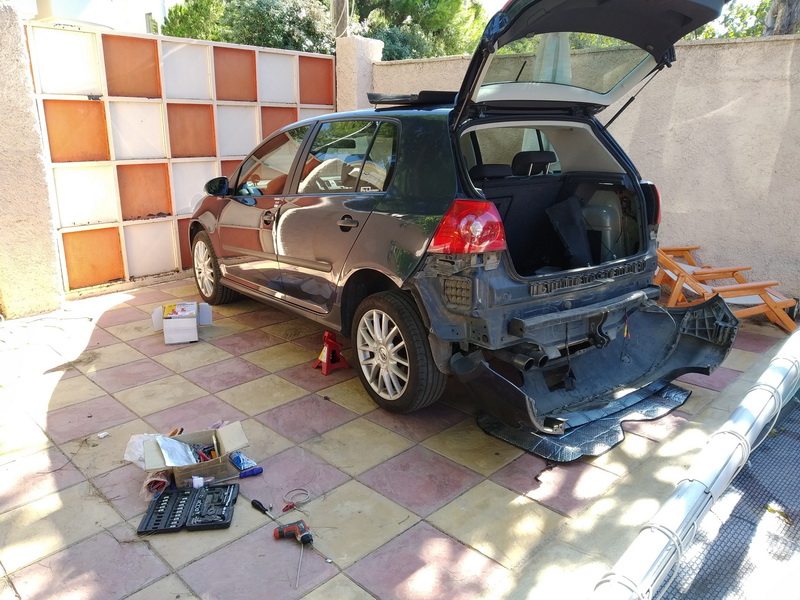
…χρειάστηκε να βγει προφυλακτήρας, ώστε να χω πρόσβαση στα καλώδια της κάμερας του αυτοκινήτου.
Επ΄ευκαιρία… το χειρόφρενο πιάνει ΚΑΙ στους δύο πίσω τροχούς! Τους είχα στον αέρα και τους δυο, με τρίποδα σταθεράστηριγμένα από κάτω, με το κιβώτιο στο Ρ και το χειρόφρενο τραβηγμένο…
Ετσι είχα άπλετο χώρο να λύσω τις βίδες του προφυλακτήρα με ηλεκτρικό κατσαβίδι σε χρόνο dt!
Απαξ και κατανόησα πως παίζει…
Τρύπημα στο πλαστικό ψηλά, τοποθέτηση του διακόπτη, μάκρυμα μερικά καλώδια να φτάσουν μέχρι εκει…
Επεσε το σχετικό… βρισίδι! χεχε
Στην ουσία στο διακόπτη πέρασα το (+) του Video (από το RCA). Εκοψα το (+) του RCA και τα δύο κομμένα άκρα (με μάτισμα μάκρυνα τα καλώδια λίγο) τα έβαλα στις φίσες 1 και 2 του διακόπτη. Στη φίσα 3 του διακόπτη έβαλα το (+) του RCA της κάμερας του τρέιλερ.
Το (-) του ρέυματος της κάμερας του τρέιλερ πήγε στη γείωση του αυτοκινήτου.
Το (+) του ρεύματος της κάμερας του τρέιλερ πήγε στο (+) της κάμερας του αυτοκινήτου.
Το (-) του RCA της κάμερας του τρέιλερ πήγε στο (-) του RCA της κάμερας του αυτοκινήτου.
Το (+) του RCA της κάμερας του τρέιλερ πήγε στη φίσα 3 του διακόπτη, όπως είπα.
και το αποτέλεσμα:
αυτό… περισσεύει! Τι? Η αδιάβροχη φίσα! Οταν χρειαστεί, την κρεμάω απέξω… ΔΕΝ τσακίζουν τα καλώδια!
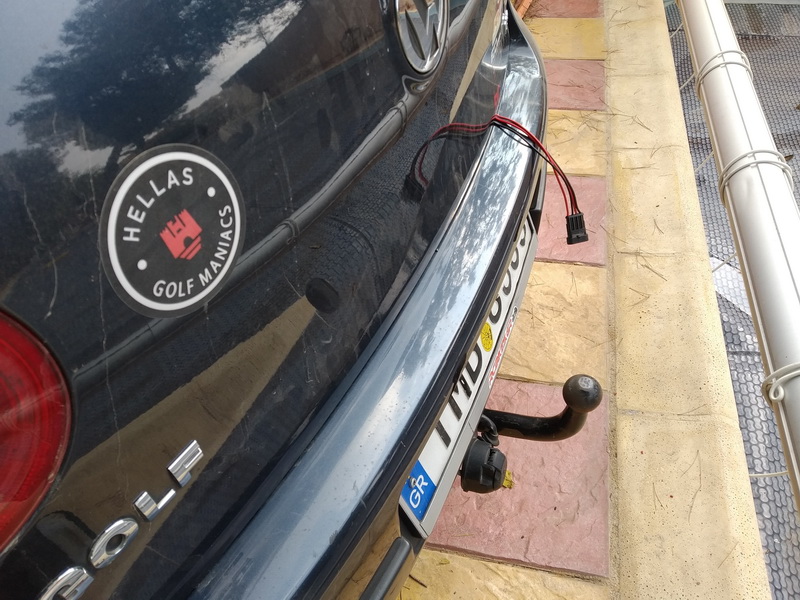
Κοτσάρουμε… βυσματώνουμε…
Γυρίζοντας το διακόπτη στην “πισω” κάμερα… τα λεντ ανάβουν! Καλό σημάδι!
Πάμε έξω στο δρόμο! Πρέπει να το πλύνω, ε;!!!
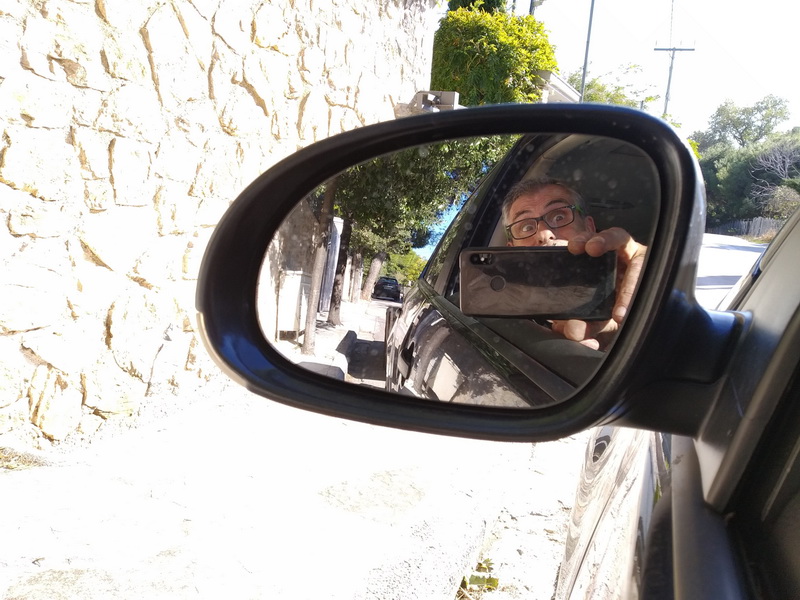
Ωπ! Σέλφι!
Τι βλέπει η κάμερα του αυτοκινήτου!
Τι βλέπει η κάμερα του τρέιλερ!
Γιατί ο διακόπτης στο πορτ μπαγκάζ?
Διότι η διαδικασία μου είναι ως εξής:
Βιδώνω κοτσαδόρο. (1 λεπτό, 2 βίδες)
Κοτσάρω τρέιλερ
Βυσματώνω τα ηλεκτρικά (φώτα) του τρέιλερ
Κουμπώνω τη φίσα της κάμερας
Αλλάζω θέση στο διακόπτη της κάμερας στο πορτ μπαγκάζ.
Την ανάποδη διαδικασία κάνω όταν γυρίσω στη βάση…
Συνολικό κόστος περίπου 20 ευρώ, συνυπολογίζοντας τις αδιάβροχες φίσες, το εργαλείο, την κάμερα στο πλαίσιο της πινακίδας, τα καλώδια κλπ
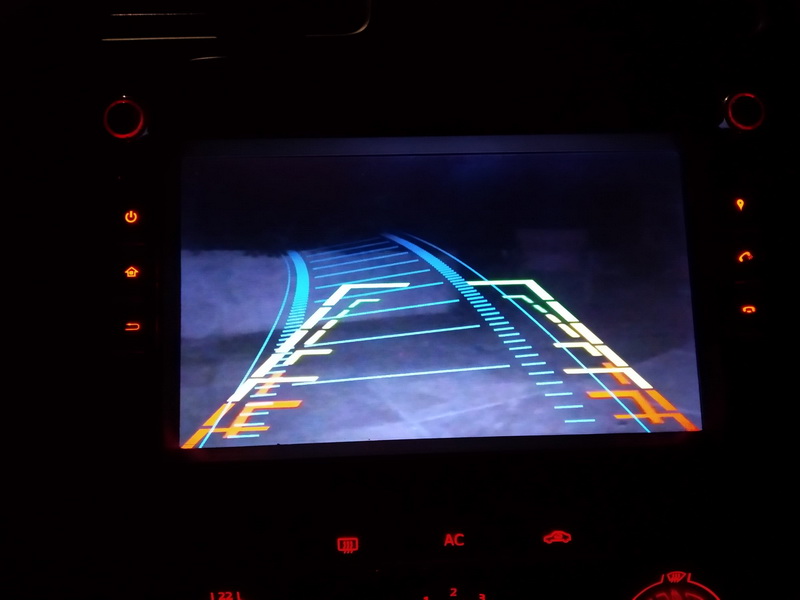
Και μια βραδινή λήψη!!!
.jpg)
.jpg)