How to Set Up a Car DVD Player for Your Car

If you have kids, take your car on long trips or enjoy camping, you may wish to install a DVD player in your car for entertainment on the road. You can purchase car multimedia player and LCD screen, or just a plain DVD player to use with existing LCD screens in your car.

Steps:

1

1: Open the hood of the car and disconnect the battery. You can disconnect the negative cable only and still be safe, but it’s best to disconnect both the positive and the negative cable.
2
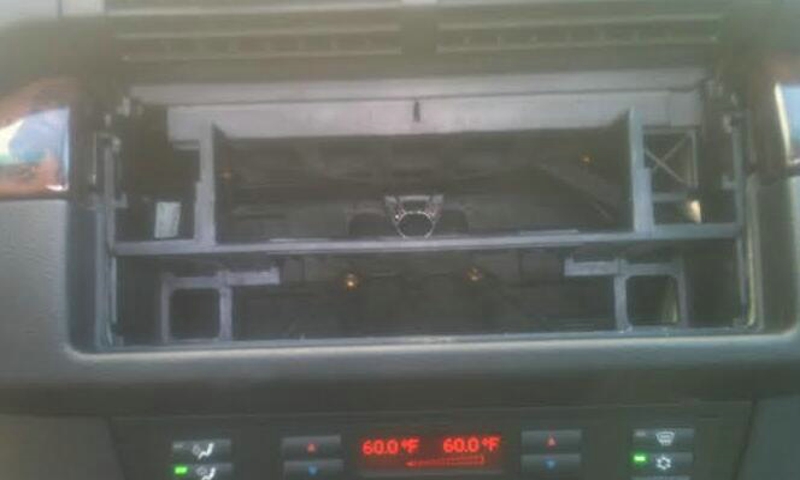
2: Using the proper screwdriver, take out the screws holding the factory stereo in your car’s dashboard, then remove the stereo from the dash. You may have to remove parts of the dash to take the stereo out.
3
3: Carefully remove the connectors from the back of the stereo. Check the connectors to make sure they’re not broken or dirty.
4
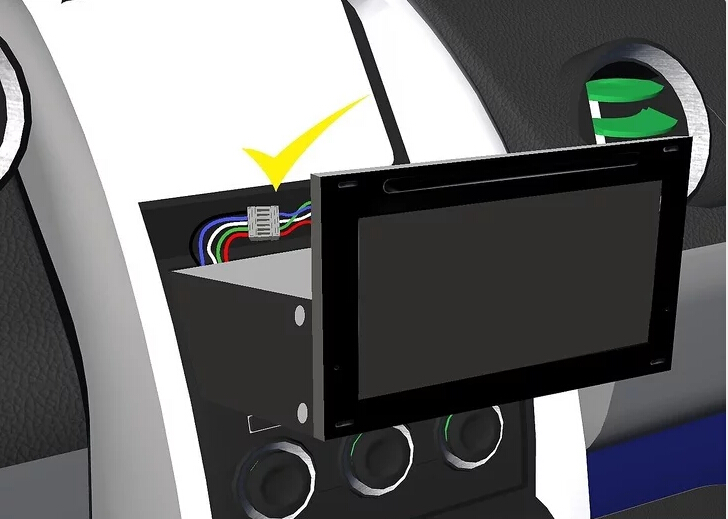
4: You can buy a wiring harness designed for your vehicle at a car audio and video equipment dealer; these are intended for aftermarket installations. Connect the wiring harness to the car’s connector. See the wiring harness instructions for the proper connection.
5
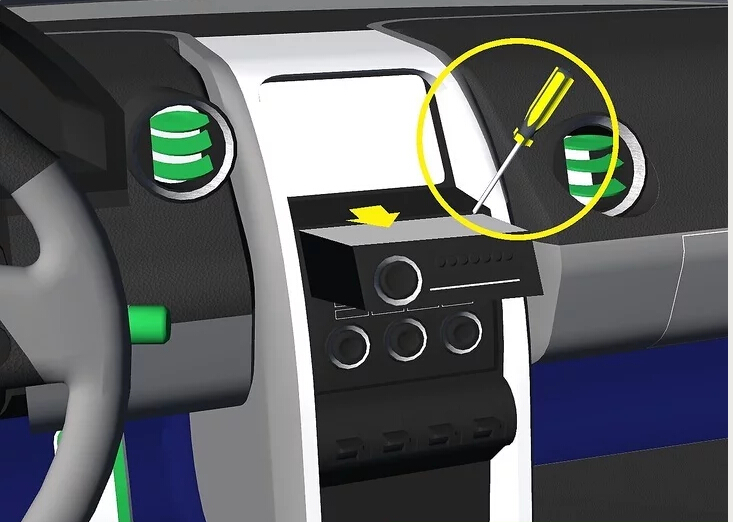
5: Insert the car DVD player in the aftermarket installation kit head unit. All dashboards are different, so you must buy an installation kit that matches the make of car.
6
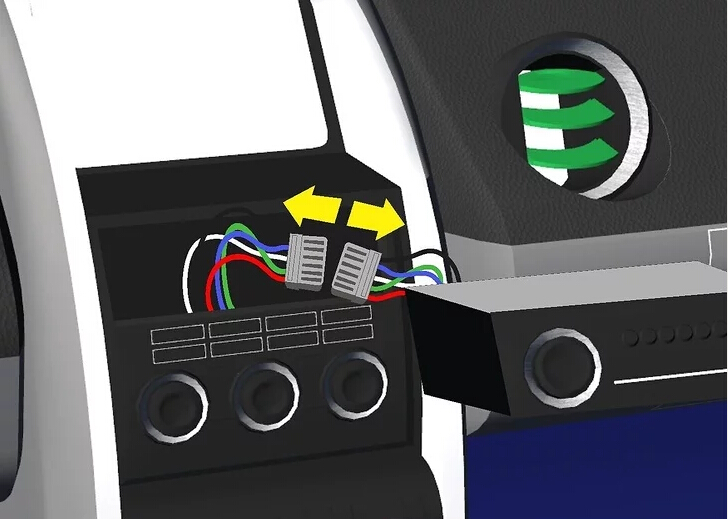
6:Connect the other end of the wiring harness to the back of the car DVD player.Connect the antenna cable to the antenna input on the back of the car DVD player.
7
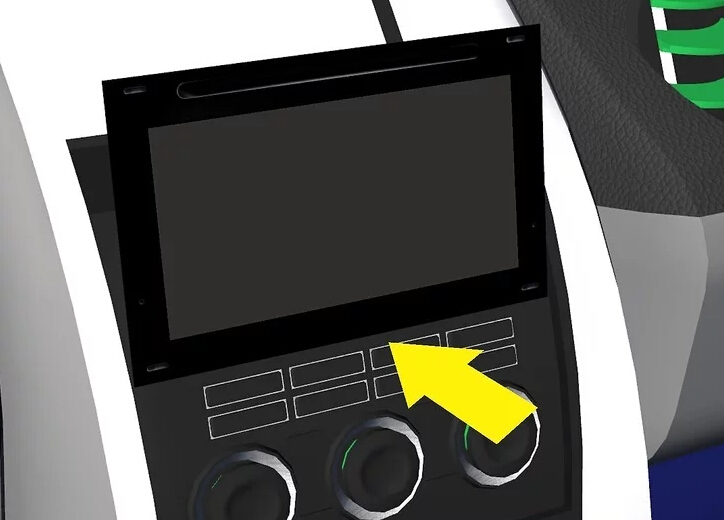
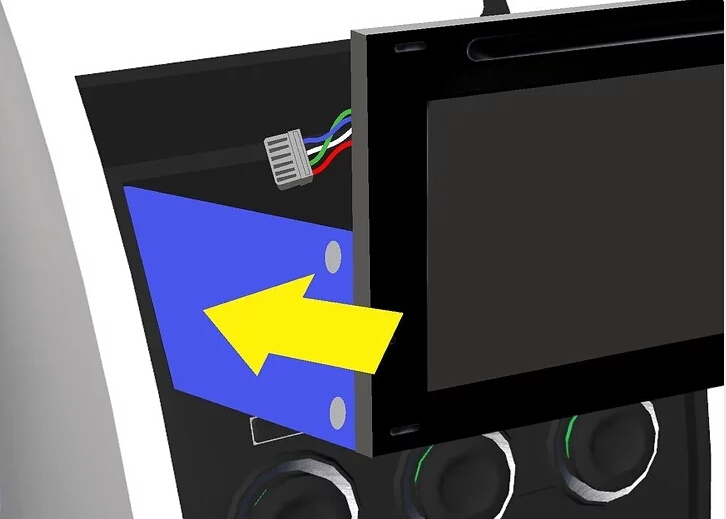
7:Insert the car DVD player and the installation kit in the car’s dash. Put in any screws that are required and replace any dash panels that you removed.
8
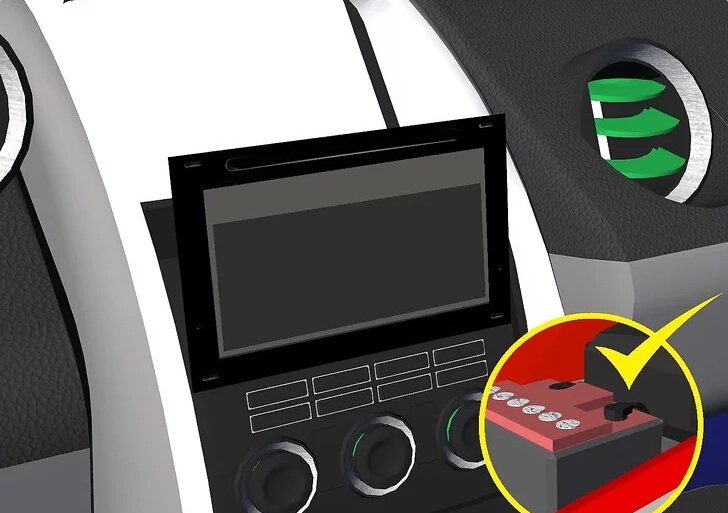
8: Replace the battery cables and make sure they are tightened. Close the hood and turn on the car. The car DVD player panel will light up if the installation was successful.
2017-05-05


Car Stereo Installation For Beginners

The installation kits and guides for android car stereo systems are handy and helpful not only for beginners but also for those who want to try their hand in doing small repairs or remodeling.

http://www.autopumpkin.com/images/CN03-04101B-US-A/2gb%20ram%20android%205.1%20Opel%20Vauxhall%20car%20radio%20(1).jpg

Installation may mean adding new features or replacing the stock audio system. You can customize the stock audio system of your car by replacing the stereo, speakers and amplifier with those of your choice.

Before actually starting the installation task, double-check that you are in ready possession of the needed tools, like screwdrivers, wire stripper, crimper, wiring ties, butt splices, the dash bit, etc. In some cases, you may require an antenna adapter. These are readily available with your stereo retailer.

The best way to install your car speakers, stereos, amplifiers etc is to follow the instructions given in the instruction manual. Every car has a specific model of audio system. So, plan what best you can install in your vehicle.

In most cars, the front speakers are preferably round, while the rear speakers are oval. It is better if you choose to retain same stock location for speakers, to avoid breaking the door panel or the retaining dips in case of removing speakers installed in doors.

Basically, car stereo installation includes radio installation, front speaker, rear end speaker installation and the selection of equipment.

You can upgrade your car stereo system and install equipment with better features. For example, you can choose a head unit with remote control and a rigid face.

The head unit is the mostly likely part that is upgraded whenever there is any new arrival in the market. After all, the speakers and stereos determine the quality of sound produced.

Some of the other components which are upgraded in a high-end car stereo are amplifiers, alternators, cables, audio processors, woofer enclosure, equalizers, DVD, navigation etc.

You need to constantly upgrade the alternators according to your vehicle’s current capability in terms of the electrical system. If you want to install very large audio systems in your car, then you may need loads of batteries to control fluctuations in current flow and thereby enjoy your favorite music for longer periods. You would not run out of power.

In the US, to assist you in high-end or custom car stereo installations, there are a couple of learning centers, namely The Syntec Technical School and Mobile Dynamics.

http://www.autopumpkin.com/images/CN03-04101B-US-A/2gb%20ram%20android%205.1%20Opel%20Vauxhall%20car%20radio%20(3).jpg

If music is your passion, then install an audio system perfectly suited to your car and listen to your favorite music endlessly.

Car Stereos provides detailed information on Car Stereos, Car Stereo Systems, Car Stereo Installations, Car Stereo Speakers and more. Car Stereos is affiliated with Wholesale Car Audio.


Tips On Installing Android BMW Navigation System DVD Player

More and more BMW X5 E53 owners prefer to upgrading the factory car stereo with an aftermarket one which has DVD player and GPS navigation system built-in,such as Pumpkin Android BMW navigation dvd,wince 6.0 BMW navigation car dvd. And some of these people would like to install the new replacement by themselves, but there may be some problems during installation if you have never installed an aftermarket car gps dvd palyer before. We write this post to introduce you some tips on installation of Pumpkin android 5.1 BMW Car Navigation GPS DVD Player.

If your BMW X5 e53 just comes with factory car radio and CD player in dash, there’s a plastic cage inside of the dashboard as you can see after you take out the factory radio and CD, if you don’t remove this cage, you may think it does not fit into the opening of the original entry, the new BMW navigation dvd unit can not be pushed entirely into the dashboard, see pics below:


Don’t worry, there are two methods which can allow you to push the new BMW X5 navigation car dvd into the dashboard fully. Some installers just cut the plastic cage, and others remove it.

In order to remove the plastic cage, firstly take off the 4 screws that hold the cage in place, 2 on the right side, and 2 on the left side (same as right side). The following pictures are for your reference:


You need to pull down and slightly left the dash part which is close to the steering wheel. When you are doing this, use your other hand to push down in the middle of the opening where the cage is, and as you opened/pulled the dash/trim this far, you are able to hold it with one hand in this position and start wiggling the cage with your other hand. When are doing this, some force is necessary, but not too much. Once you start playing with it, you will get the jest on how to pull out the hooks, then as you have the left hook out, you now pull to a side and down on the right side (glove compartment side) to clear the other hook.

Once you removed the plastic cage, you are able to push into the new unit into the dash fully. And you will need to use the included iron frame support to fix the new unit to the dash, you may check the following photo as referrence.

If your BMW X5 E53 comes with factory navigation system, there’s a large screen in the dash, the 17pins(before year 2002) or 40pins(after year 2002) plug is not at the back of your factory radio, it’s located under the trunk, so you need to use a 5m long power cable with 17pins or 40pins plug to connect the correct plug under the trunk.

The following video may help you about that!


Pumpkin official websites:
German site: www.autopumpkin.de