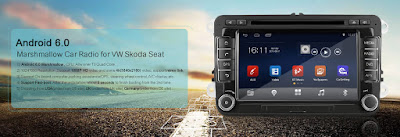
FAQ auf Pumpkin Autoradio


Dieses Thema wird erstellt, um den richtigen Weg zu führen Sie Pumpkin Autoradio zu erzählen. Außerdem wird es Ihnen beibringen, wie man die gemeinsame Bedienung Fragen zu lösen. Sie können die Lösung über den folgenden Beitrag finden, wenn Sie einfache Fragen zu Ihrem Gerät haben.


Kabel Verbindung


Bitte korrekt anschließen der Kabel entsprechend dem Anschlussplan auf der Oberseite des Geräts.


Stromkabel


Es gibt drei Stromkabel in der ISO-Kabelbaum, Sie sind rot, gelb und schwarz. Bitte rote Kabel an das Zündkabel anschließen.Gelbe Kabel muss konstant 12V Netzteil haben.Und schwarze Draht ist für die negative macht.
Wenn Ihr Gerät unterstützt Lenkrad-Control-Funktion, Es hätte drei Lenkrad-Steuerleitungen(nicht enthalten, wenn Ihr Gerät verfügt über Can-Bus Schnittstelle) wSie sind auch zwei Positive und eine Negative. Achten Sie darauf, nicht zu verwechseln, die Stromkabel und Lenkrad-Steuerkabel, oder Ihr Artikel wird verbrannt.


Bremskabel


Das Bremskabel sollten an Ihrem Auto Handbremse angeschlossen werden. Auf diese Weise können Sie nur um Videos zu sehen, wenn Ihr Auto nicht läuft. Für den Beifahrer Nachfrage,Sie können Videos ansehen, während Sie unterwegs sind, Sie können das Bremskabel an negative macht Ihr Auto anschließen.. Aber wir empfehlen dringend Treiber nicht um Videos während der Fahrt zu sehen.


Audio-Kabel


Es gibt 4 Adernpaare audio kable in der ISO-Kabelbaum, Sie sind grau, grün, weiß und lila. Sie müssen jedes Paar an den entsprechenden Autolautsprecher anschließen. Z. B. verbinden die weißen Kabelpaar mit den vorderen linken Lautsprecher, eine für die Positive und die andere für die Negative.
Achtung:
Lassen Sie sich nicht die Kabel, die einander berühren. Sie können einige Isolierband auf diese Kabel legen, vor allem auf die nicht verwendeten Drähte.


Restaurierung 


Dieses Element hat eine Schaltfläche “RES” (normalerweise auf der Frontplatte oder hinter der Frontblende).Sie können die RES Taste Wenn Ihr Artikel ein Systemproblem hat, dann wird es auf die Werkseinstellungen wiederherstellen. 


Schalten Sie 


Sobald Sie das Netzkabel richtig anschließen, die Power-LED leuchtet rot. Dann die SRC Taste auf der Frontplatte,Sie können das Gerät einzuschalten..
Wenn die Power-LED nicht rot ist, Bitte überprüfen Sie den Netzanschluss-Kabel. Und stellen Sie bitte sicher, dass die Spannung des Fahrzeugs macht zwischen 12v-14v.
Wenn die Power-LED rot,aber Sie können nicht das Gerät einschalten, indem Sie auf die Schaltfläche SRC, Bitte versuchen Sie es mit der Fernbedienung einschalten, und bitte prüfen Sie, ob Ihr Fahrzeug zwischen 12v-14v macht.


Motorisierte Panel 


Wenn Ihr Artikel eine motorisierte Panel hat, Es erlaubt Ihnen, ihre Rasterwinkel einstellen. Außerdem hat solche Gruppe Positionsspeicher. Wenn Sie neu starten, kehrt das Panel im Winkel zurück hat es, wenn Sie das Gerät ausschalten.
Wenn Ihr Panel nicht die Stellung-Erinnerung halten, Bitte überprüfen Sie die Kabelverbindung macht. Achten Sie darauf, die der gelben Draht sollte konstant 12V Netzteil haben, Ansonsten keine Erinnerung gehalten werden.


Festplatten


Legen Sie einen CD/DVD-Datenträger bzw. nach DVD-Modus, Genießen Sie Ihre Lieblingsmusik und-Filme durch diesen Gegenstand.
Wenn Sie den Datenträger nicht einfügen können, Bitte überprüfen Sie ob die schützende Schraube an der Oberseite Ihres Artikels entfernt.
Wenn der Datenträger kann nicht gelesen werden,versuchen Sie andere CD- und DVD-Laufwerke, für den Fall, dass Ihre erste Platte ist zerkratzt oder das Format nicht unterstützt werden. 


Radio 


Klicken Sie auf das Radio-Symbol auf dem Touchscreen, Sie können den Radio-Modus. Ihre Lieblingssender speichern, Bitte halten Sie die Stationstasten.
Bitte halten Sie die Stationstasten, Bitte überprüfen Sie, ob es in der richtigen Frequenz-Bereich ist (Normalerweise finden Sie es im Setup-Menü). Außerdem prüfen Sie bitte ob Ihre Radio-Antenne eingesteckt worden, und ob das Signal stark genug ist.


Bluetooth Wireless-Verbindung 


Bitte befolgen Sie die unten aufgeführten Schritte, dieses Element mit Ihrem Bluetooth-Handy verbinden.
1. Schalten Sie dieses Element, um den Bluetooth-Modus.
2. (Optional) Presse die Taste “Koppeln”.
3. Verwenden Sie Ihr Bluetooth-Handy, um dieses Element zu suchen, Das Car Kit oder Fihonest genannt.
4. Füllen Sie das Passwort “0000” oder “1234”.
Dann werden Sie in der Lage, ein Telefongespräch haben oder genießen Sie die Musik auf Ihrem Handy über diesen Artikel.
Sie können die Wechsel-Taste wechseln Sie zwischen diesen Artikel und Ihr Mobiltelefon.
Wenn dieses Element mit Ihrem Telefon verbunden werden kann, Bitte haben Sie einen Versuch mit anderen Handys. Vielleicht ist es einfach nicht kompatibel mit Ihrem mobilen Modell.

Klicken Sie um zu überprüfen, Pumpkin Android 6.0 autoradio,Andorid 5.1 Autoradio, Kopfstützen MonitorRückfahrkamera und andere Auto-Zubehör auf Pumpkin offiziellen Websites:

DE site: www.autopumpkin.de
US site: www.autopumpkin.com
UK site: http://ift.tt/29hvZcz


FAQ on Pumpkin Car Radio GPS DVD Stereo


This topic is created to tell you the correct way to run our Pumpkin Car Radio DVD GPS Players. Besides, it will teach you how to solve the common operation questions. You may find the solution via the following posts if you have any simple question with your item.


Cable Connection


Please correctly connect the cable according to the connection diagram on the top surface of your Pumpkin car stereo.


Power cable


There are three power wires in the ISO wiring harness, they are red, yellow and black. Please connect red wire with the ignition wire. Yellow wire has to be connected to constant 12V power supply. And black wire is for the negative power.
If your item has steering wheel control function, it should have three steering wheel control wires(except for can bus interface controlled head units) which are also two positive and one negative. Please pay attention not to mix up the power cable and steering wheel control cable, or your item will be burned.


Brake cable


The brake cable should be connected to your car’s hand brake. In this way you will only be allowed to watch videos when parking your car. To meet your front passenger’s demand of watching videos while you are driving, you can connect the brake cable to your car’s negative power. But we strongly suggest drivers not to watch videos while driving.


Audio cable


There are 4 pairs of audio wires in the ISO wiring harness, they are grey, green, white and purple. You need to connect each pair to the corresponding car speaker. For example, connect the white pair of wires to the front left speaker, one for the positive and the other for the negative.
Attention:
Please don’t let the wires touch each other. You can put some insulating tape on them, especially for those unused wires.


Restoration 


This item has a RES button (normally on the front panel or behind the front panel). You can press the RES button whenever your item has any system problem, then it will restore to factory defaults. 


Switch On 


Once you connect the power cable correctly, the power light will turn Red. Then you can press the SRC button on the front panel to turn on your item.
If the power light doesn’t turn red, please check the power cable connection. And please make sure the voltage of your vehicle’s power is between 12v-14v.
If the power light turns red but your item can’t be turned on by pressing the SRC button, please try to switch on by the remote control, and please check whether your vehicle’s power is between 12v-14v.


Motorized Panel 


If your item has a motorized panel, it will allow you to adjust its screen’s angle. Besides, such panel has position memory. When you restart, the panel will turn back to the last angle.
If your panel doesn’t keep the position memory, please check the power cable connection. Pay attention that the yellow wire has to be connected to constant 12V power supply, or no memory will be kept.


Touch Screen 


If your touch screen reacts slowly or incorrectly, a simple calibration may sort it out. Different models’ calibration settings are in different interfaces. Please try to find out your item’s calibration setting, or tell us its model.
If there is no response after clicking the onscreen buttons, please try to loosen the screws around the front panel, since this problem may be caused by the over pressure of those tight screws.


Disks 


Put a CD/DVD disk in and turn to DVD mode, you can enjoy your favorite music and movies by this item.
If your disk can’t be put in, please check whether the protective screw on the top of your item has been removed.
If your disk can’t be read, please try other CD and DVD disks, in case your first disk is a scratched one or its format can’t be supported. 
If you can’t hear any voice, please try other disks, turn up volume, unmute the speakers and check the audio cable connection.
If there is any noise, please try other disks, check the audio cable connection and prevent the wires from touching each other.


Radio 


Clicking the radio icon on the touch screen, you can enter the radio mode. To memorize your favorite stations, please hold the station buttons.
If your radio doesn’t work well, please check whether it’s in the right frequency area (normally you can find it in the setup menu). Besides, please check whether your radio antenna has been plugged in, and whether the signal is strong enough.


Bluetooth Wireless Connection 


Please follow the below steps to connect this item with your Bluetooth phone.
1. Turn this item to Bluetooth mode.
2. (Optional) Press the PAIR button.
3. Use your Bluetooth phone to search this item, which named Car Kit or Fihonest.
4. Fill the password “0000” or “1234”.
Then you will be able to have a phone conversation or enjoy the music in your mobile via this item.
You can press the CHANGE button to switch between this item and your mobile phone.
If this item can’t be connected with your phone, please have a try with other mobiles. Perhaps it is just not compatible with your mobile’s model.


iPod Audio Input


Connect this item with your iPod and turn it to iPod mode, you can use the touch screen to control your iPod and play your favorite music. But please kindly note that this item may not be compatible with some new iPod models.
If your iPod can’t be supported by this item, please check whether it can turn to iPod mode once you connect it with your iPod. If so, this item is in good condition. You can try to connect it with the early iPod, like iPod classic or iPod nano.


USB&SD


Most of our items support USB sticks and SD Cards up to 32GB. And the supported formats include MP3, WMA, DIVX, MPEG, DAT, JPEG and so on.
If your USB sticks or SD cards are not compatible with this item, please check whether they are within this item’s maximum capacity. Besides, please note that this item doesn’t support Portable Hard Drive.
If some files in your USB sticks or SD cards can’t be opened, please check whether their formats are supported by this item.


AV Input&Output


AV input: Connect this item’s AV input cable with other players‿AV output cable, then turn this item to AV mode.
AV output: Connect this item’s AV output cable with other monitors‿AV input cable, then play a DVD disk.
If there is no video or audio transmission after the AV cable connection, please make sure the cable connection is correct and both items are in the right modes.
If the input videos are distorted or have no colors, please change this item’s TV system in the DVD mode’s setup menu.


Remote Control 


Before using the remote control, please place the battery correctly and remove the protective plastic in the bottom. 
If your remote control doesn’t work, please try to use a digital camera or your phone camera(except for iPhone) to point to the bulb on the top of the remote control. Then when you press any button, that bulb should be flashing (only you can see on the screen of your digital camera or phone camera).
If it works, that means it’s in good condition. Please use your remote control within the scope of the IR transmitter of your item.


Click to check Pumpkin Android 6.0 Car GPS Radio, Andorid 5.1 Car dvd gps,headrest monitor,back-up camera and other auto accessories on Pumpkin official website:

US site: www.autopumpkin.com
UK site: http://ift.tt/29hvZcz
DE site: www.autopumpkin.de

via Blogger http://ift.tt/2d4rXq0